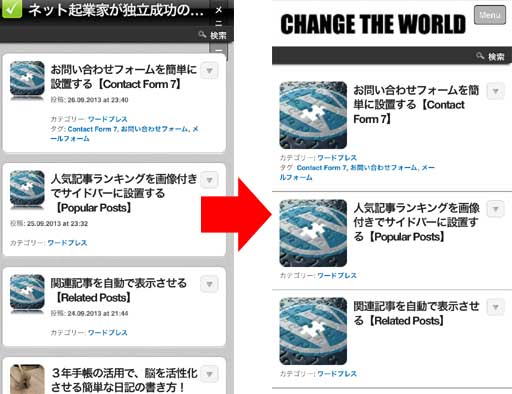
CSSのカスタマイズでは、
- wptouchスマホテーマの枠削除
- トップ画面でのサムネイルの表示拡大
- ヘッダー画像&幅設定変更
の変更が出来ます。
タイトル画像を変更し、サムネイルを少し大きくすることで、
スマホで見た時のインプレッションが大きく変わってきます。
さらに、スマホテーマの枠を取る事で、
アドセンス等の広告が、記事の中に自然にとけ込みます。
この記事はスマホ最適化、
WPTouchカスタマイズの記事です。
まだ、WPTouchを導入していない場合はコチラへどうぞ
WPtouchカスタマイズの目次はこちらへ

/public_html/wp-content/plugins/wptouch/themes/tako/
の中にある、『style.css』をpcに保存、
テキストエディタで開きます。
 WPtouchのstyle.cssファイルをカスタマイズする
 スマホテーマの枠を取る
style.css の788行目あたりに
.post {
background-color: #fff;
padding: 10px;
margin-bottom: 12px;
margin-right: 10px;
margin-left: 10px;
border: 1px solid #b1b1b1;
border-radius: 8px;
position: relative;
z-index: 0;
-webkit-box-shadow: rgba(255,255,255,.8) 0px 1px 0px; box-shadow: rgba(255,255,255,.8) 0px 1px 0px;
}
とありますので、
.post {
background-color: #fff; padding: 10px;
border-bottom: 1px solid #999;
}
に書き換えます。
 トップ画面でのサムネイルの表示拡大
style.css の2228行目あたりから
.wptouch-post-thumb-wrap {
position: relative;
margin-right: 8px;
display: block;
margin-bottom: 4px;
width: 46px;
height: 46px;
float: left;
}.wptouch-post-thumb img {
width: 46px;
height: 46px;
とありますので、
赤文字の
width: 46px;
height: 46px;この部分を
width: 90px;
height: 90px;
へ書き換えます。
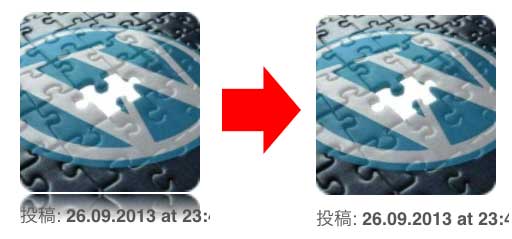
 サムネイル下側の影を消したい時
さらに、サムネイル下側についている影を消したい時は
先ほどの部分の後ろに、
overflow:hidden;を、以下のように付け足します。
.wptouch-post-thumb-wrap {
position: relative;
margin-right: 8px;
display: block;
margin-bottom: 4px;
width: 90px;
height: 90px;
float: left;
overflow:hidden;
}.wptouch-post-thumb img {
width: 90px;
height: 90px;
このようになります。

 タイトル画像&幅設定変更
作成したタイトル画像をサーバーにアップします。
このサイトの場合だと、![]() ダッシュボードの設定変更解説ページ
ダッシュボードの設定変更解説ページ
で作成した「tako」フォルダ内に、「img」フォルダを作成し、
そこに画像を入れています。
このような感じです。
/wp-content/plugins/wptouch/themes/tako/img/title.jpg
今回、画像のサイズは、横250、縦50で作成しました。
cssの176行目あたりから、赤文字の部分を書き換えます。
#headerbar {
width: 100%;
background-position: 0 0;
background-repeat: repeat-x;
height: 65px;
border-bottom: 1px solid #1e1e1e;
font-size: 19px;
-webkit-touch-callout: none;
}#headerbar-title {
text-shadow: #242424 -1px -1px 1px;
padding-top: 10px;
padding-left: 10px;
display: block;
margin: 0;
border-style: none;
padding-bottom: 4px;
-o-text-overflow: ellipsis;
-ms-text-overflow: ellipsis;
text-overflow: ellipsis;
white-space: nowrap;
overflow: hidden;
width: 85%;
font-weight: bold;
height: 50px;
}#headerbar-title a {
letter-spacing: -1px;
position: relative;
display: block;
width: 280px; /*タイトル画像の横幅*/
height: 50px; /*タイトル画像の高さ*/
text-indent: -9999px;
overflow: hidden;
background: url(‘http://ここに画像のurlを記入’) no-repeat 0 0; /*タイトル画像の場所*/
}
タイトル画像が無事に変更になったら、
背景色の変更とタイトルアイコンを削除します。
ヘッダー部分の背景色は、ダッシュボードの設定から出来ます。

タイトルアイコンの削除は headerカスタマイズ で行います。


Warning: Use of undefined constant 編集 - assumed '編集' (this will throw an Error in a future version of PHP) in /home/xxtakoxx/officehit.biz/public_html/wp-content/themes/refinepro/functions.php on line 453
こちらの記事を参考に思い通りにカスタムできたのですが、トップページサムネイル上に表示される赤丸のコメント件数がおかしく表示されます。コメントが無いのに件数が表示されたり、コメントがある記事に表示されなかったりします。具体的には、古い記事にコメントをすると最新記事に件数がまとめて表示されてしまいます。これを解消する方法はありますでしょうか。
Warning: Use of undefined constant 編集 - assumed '編集' (this will throw an Error in a future version of PHP) in /home/xxtakoxx/officehit.biz/public_html/wp-content/themes/refinepro/functions.php on line 453
タロウさま。
はじめまして、コメントありがとうございます。
解決法を調べて、更新していこうと思います。
申し訳ありませんが、
気長にお待ちください。
今後とよろしくお願いします。